If your doctor has prescribed insulin injections, you might feel overwhelmed or anxious. This is a very common feeling, but with the right knowledge, giving yourself an injection can quickly become a simple, manageable part of your daily routine. This guide is designed to walk you through everything you need to know, from the different types of insulin to the best insulin injection sites, so you can feel confident and safe in managing your health.
Table of Contents
What Are Insulin Injections and Why Are They Needed?
Insulin is a hormone naturally produced by your pancreas that helps your body use sugar (glucose) from food for energy. In people with diabetes, the body either doesn’t make enough insulin (Type 1 diabetes) or doesn’t use it effectively (Type 2 diabetes).
According to the Centers for Disease Control and Prevention (CDC), insulin injections are a way to deliver this life-saving hormone into your body. Because insulin is a protein, it would be digested and broken down if taken as a pill. An injection delivers it into the fatty tissue just under the skin, allowing it to be absorbed into your bloodstream where it can get to work.
Understanding the Main Types of Insulin
Not all insulin is the same. Your doctor will prescribe one or more types of insulin based on your blood sugar patterns, diet, and lifestyle. The American Diabetes Association (ADA) categorizes them by how quickly and how long they work.
- Rapid-acting: Starts working in about 15 minutes and peaks in 1-2 hours. It’s typically taken right before a meal.
- Short-acting (Regular): Starts working in about 30 minutes and peaks in 2-4 hours. It’s taken 30-60 minutes before a meal.
- Intermediate-acting: Starts working in 2-4 hours and can last for 12-18 hours.
- Long-acting (Basal): Starts working in 2-4 hours and provides steady coverage for up to 24 hours or more.
- Pre-mixed: A combination of two different types of insulin, offering both mealtime and all-day coverage in one shot.
Insulin Delivery: Insulin Pen vs. Syringe
You will also have a choice in how you deliver your insulin. The two most common methods are traditional syringes and modern insulin pens.
Insulin Vials and Syringes
This is the classic method. You use a sterile syringe with a needle to draw up your dose from a small bottle (vial) of insulin.
- Pros: Often a lower-cost option.
- Cons: Requires you to manually draw the correct dose, which can be difficult for people with vision or dexterity issues.
Insulin Pens
These devices look like large writing pens and hold a cartridge of insulin. You attach a new, disposable needle for each injection, dial your exact dose, and press a button to inject.
- Pros: Highly convenient, portable, and easy to use. Great for accurate dosing.
- Cons: Can be more expensive, and not all insulin types are available in a pen.
Your healthcare team will help you decide which method is best for your insulin pen vs. syringe options.
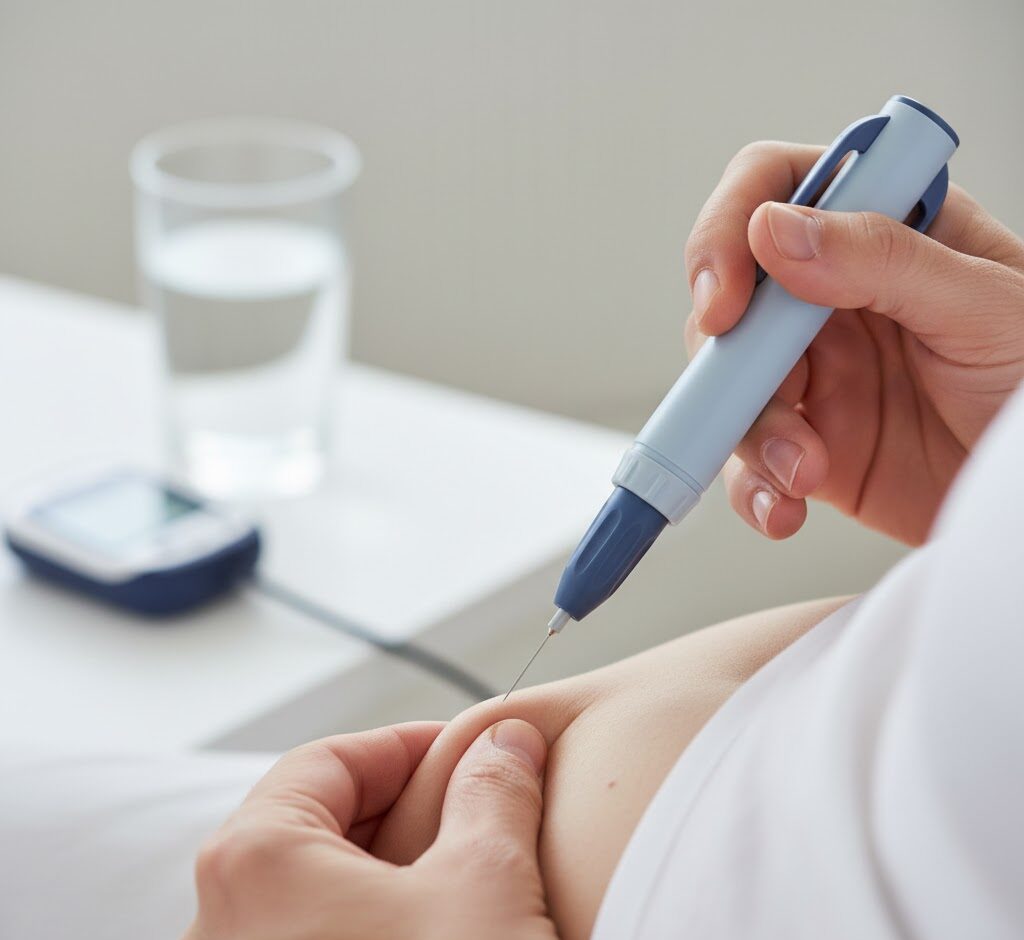
How to Give Insulin: A Step-by-Step Guide
Learning how to give insulin is a process, but these steps make it straightforward. Always follow the specific instructions from your diabetes educator.
- Gather Supplies: You will need your insulin, a new syringe or pen needle, and an alcohol swab.
- Prepare the Insulin: Check the expiration date. If your insulin is cloudy (like NPH), gently roll the vial or pen between your palms to mix it. Do not shake it.
- Prepare the Dose:
- Syringe: Draw air into the syringe equal to your dose, inject the air into the vial, and then draw out the correct amount of insulin.
- Pen: Attach a new needle, remove the caps, and “prime” the pen by dialing 1-2 units and injecting into the air to ensure it’s working. Then, dial your correct dose.
- Choose and Clean Your Site: Select a spot from your insulin injection sites (more on this below). Clean the skin with an alcohol swab and let it air dry.
- Inject the Insulin: Gently pinch a 1- to 2-inch fold of skin. Insert the needle at a 90-degree angle (or 45 degrees if you are very thin). Push the plunger or pen button to inject the insulin.
- Hold and Remove: Count to 5 or 10 (as instructed by your pen’s manufacturer) before removing the needle. Release the pinch.
- Dispose Safely: Immediately place the used needle in an FDA-approved sharps container. Never throw loose needles in the trash.
The Best Insulin Injection Sites
Choosing the right location for your insulin injections is crucial for proper absorption. The best sites are areas with a good layer of fat.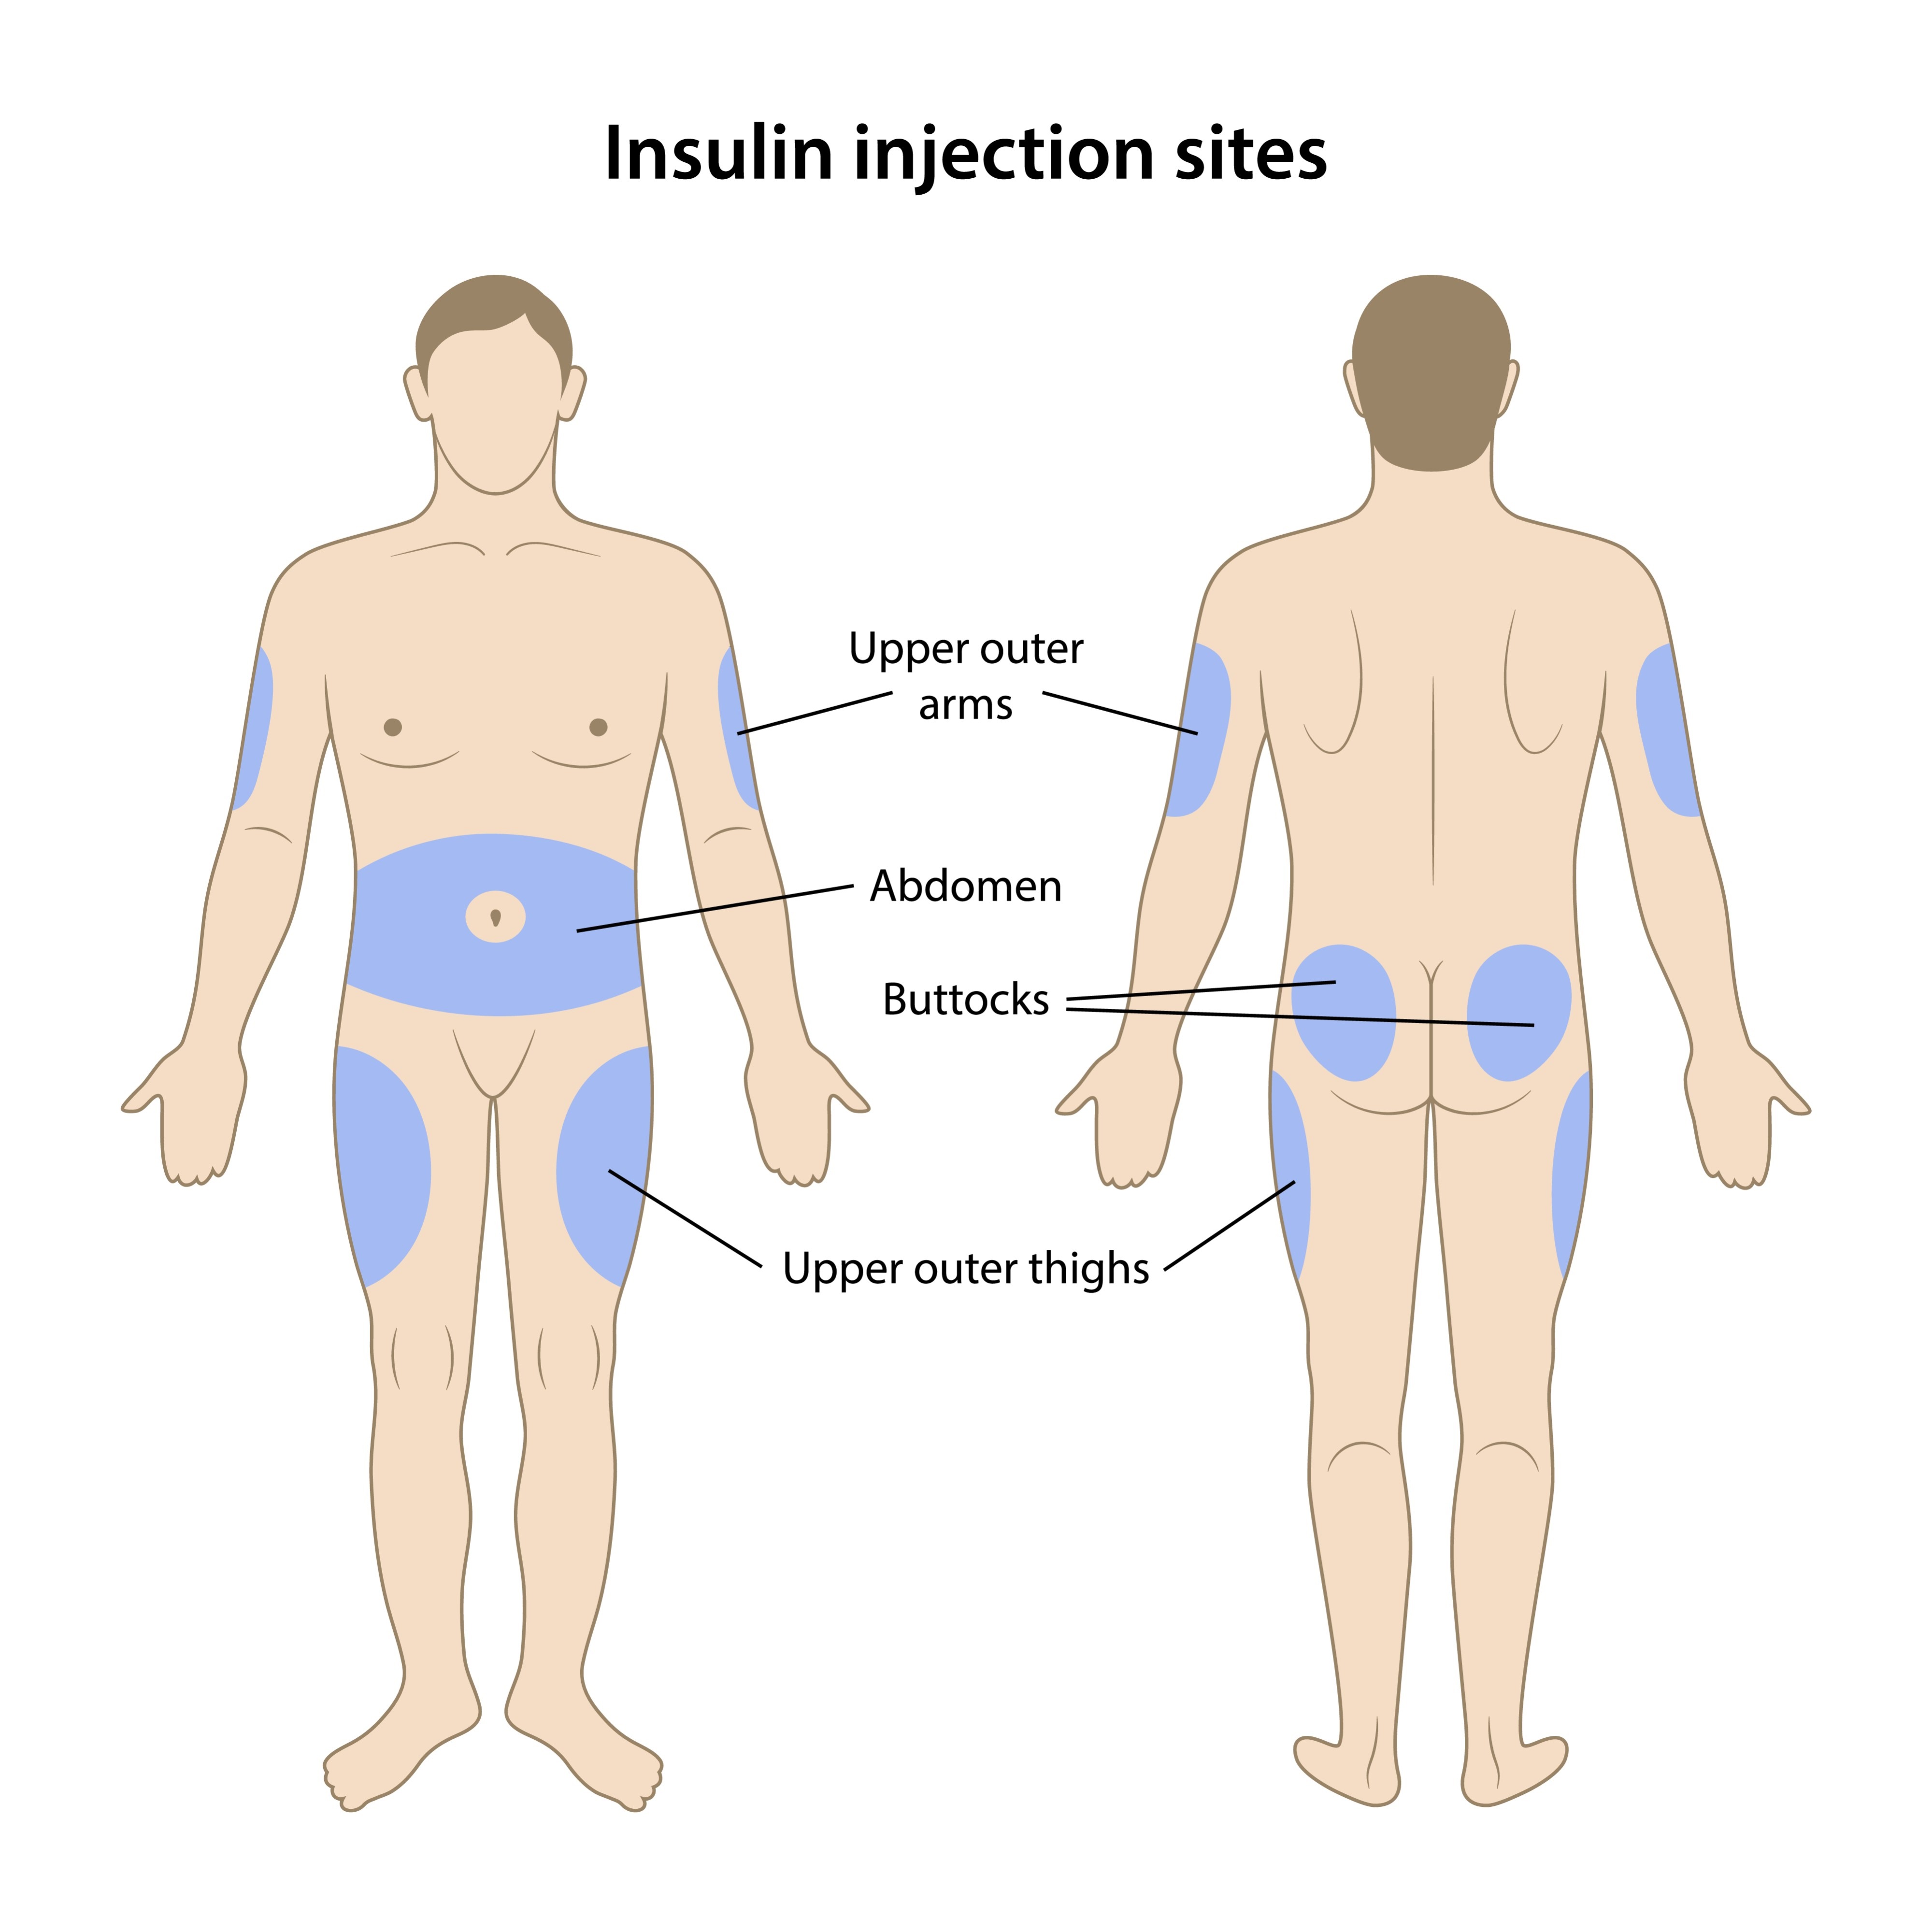
Common Injection Sites
- Abdomen: The most common and reliable site. Insulin is absorbed quickly and predictably here. Avoid the 2-inch area around your belly button.
- Thighs: The top and outer areas. Insulin is absorbed more slowly from here.
- Upper Arms: The fatty area on the back of your arm. Insulin absorption can be moderate.
- Buttocks: The upper, outer area. This is another site for slower absorption.
The Importance of Site Rotation
You must “rotate” your insulin injection sites. If you inject into the same spot repeatedly, you can develop hard lumps or fatty deposits called lipohypertrophy. As the Mayo Clinic explains, this scar-like tissue can prevent insulin from being absorbed properly.
Pro Tip: Try to use one general area (like your abdomen) for a week, but move your injection spot about 1 inch each time. Then, switch to a different general area (like your right thigh) the next week.
Common Side Effects of Insulin Injections
While safe and effective, insulin injections can have potential side effects.
- Hypoglycemia (Low Blood Sugar): This is the most common side effect. It happens when you have too much insulin, which lowers your blood sugar too much. Symptoms include shakiness, sweating, confusion, and dizziness.
- Weight Gain: Insulin can make it easier for your body to store fat, so some weight gain is common when starting therapy.
- Site Reactions: You may experience redness, swelling, or itching at the injection site. This is usually mild.
- Lipohypertrophy: The lumps or dents at injection sites, as mentioned above. This is preventable with good site rotation.
When to See a Doctor
You should be in regular contact with your healthcare team, but contact them immediately if you experience:
- Severe Hypoglycemia: Confusion, seizures, or loss of consciousness. This is a medical emergency.
- Signs of an Allergic Reaction: A rash all over your body, swelling of the face or tongue, or difficulty breathing.
- Signs of Infection: Redness, warmth, or pus at an injection site that doesn’t go away.
- Persistent Lumps: If you notice hard, painful lumps at your injection sites, show your doctor.
- Blood Sugar You Can’t Control: If your blood sugar levels are consistently too high or too low, your dose may need to be adjusted.
Disclaimer: This article is for informational and educational purposes only. It is not a substitute for professional medical advice, diagnosis, or treatment. Always seek the advice of your physician or another qualified healthcare provider with any questions you may have regarding a medical condition. Never disregard professional medical advice or delay in seeking it because of something you have read here.
Published on October 27, 2025 and Last Updated on October 27, 2025 by: Priyank Pandey
Get real time update about this post category directly on your device, subscribe now.